ESP Home Controller – Quick Start Guide
Prerequisites
The software included on the Logi.Casa ESP Controller is intended for use with Home Assistant. If you need to set up Home Assistant, additional hardware is required.
Logi.Casa offers powerful hardware that comes pre-installed with Home Assistant. Please visit our webshop for more information at www.logi.casa. If you prefer to use other hardware please follow the directions for installing Home Assistant at: https://www.home-assistant.io/installation/
Once you have Home Assistant installed and running, proceed to Getting Started.
These instructions will help you to perform the initial setup of a new device. In case something goes wrong during this setup you can revert your controller to the factory defaults and start over. To revert the device to factory settings you can reflash the initial firmware to the device. This link will give you access to our firmware installation page using ESP Web Tools. You will need to open the casing of your device and connect the home controller to your PC using a micro-USB cable that supports data transfer. While flashing the controller you need to put the DIP switch on the mainboard in flash mode. Don’t forget to reset the DIP switch after successfully uploading the firmware to the device to allow it to boot.
STEP 1 – Getting started
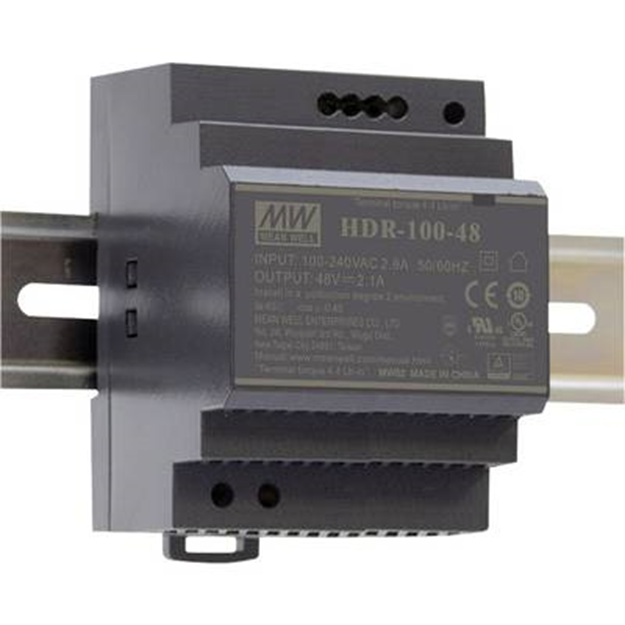
Begin by installing the Logi.Casa ESP Controller into your power distribution cabinet by clicking it onto a DIN rail. The controller needs a power supply of 24VDC with a power output of at least 15 Watt (1A). Logi.Casa recommends using a DIN mountable 24VDC power supply with sufficient power for all your 24VDC devices in your power distribution cabinet. Logi.Casa offers high quality power supplies ranging from 60 Watt to 150 Watt. Please visit our webshop for more information at www.logi.casa.
It’s possible to configure multiple Logi.Casa controllers at once, but we recommend configuring the controller completely before connecting an additional controller to the network to avoid complexity.
STEP 2 – Connecting the inputs
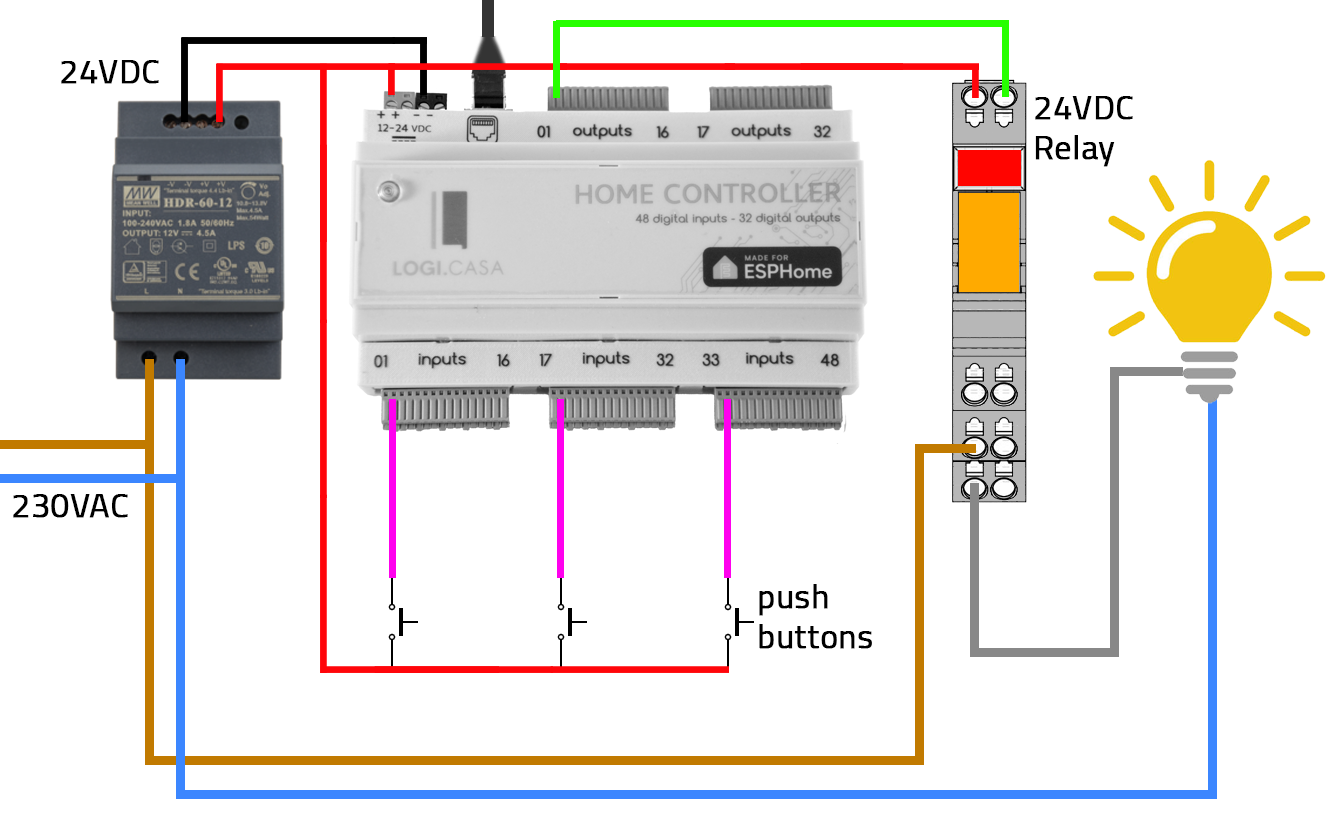
The input channels are located on the bottom of the controller. There are 3 connectors with 16 terminals each, resulting in a total of 48 digital inputs. The controller expects a positive (high) signal on each terminal to become activated. Please make sure that the ground of the power source for the controller is shared with the ground of the power source on the terminals. We recommend to use one power supply for the controller and the inputs and outputs. Please refer to the image below for an example.
STEP 3 – Connecting the outputs
The output channels are located on the top of the controller. There are 2 connectors with 16 terminals each, resulting in a total of 32 digital outputs. Each output can handle a maximum power of 500mW. Please make sure the loads connected to the outputs are below this threshold to avoid permanent damage to the mosfet’s on the controller. The outputs will conduct to ground when active, please connect to load with correct polarity. Refer to the image below for an example.
STEP 4 – Connect the controller to your network
To connect the controller to your LAN network you need to insert a networkcable with RJ45 connector into the network port located on the top of the controller.
The controller will automatically receive a IP address. We recommend configuring a fixed IP address for the controller. Please consult the documentation of your network devices to configure a fixed IP address for the controller. The MAC address of the controller is printed on the back of the controller.
STEP 5 – Install the ESPHome add-on in Home Assistant
Log in to your Home Assistant server.
The ESPHome addon needs to be installed in Home Assistant. If you already done this, please proceed to STEP 6.
Go to Settings -> Addons and click on ADD-ON STORE in the right bottom corner.
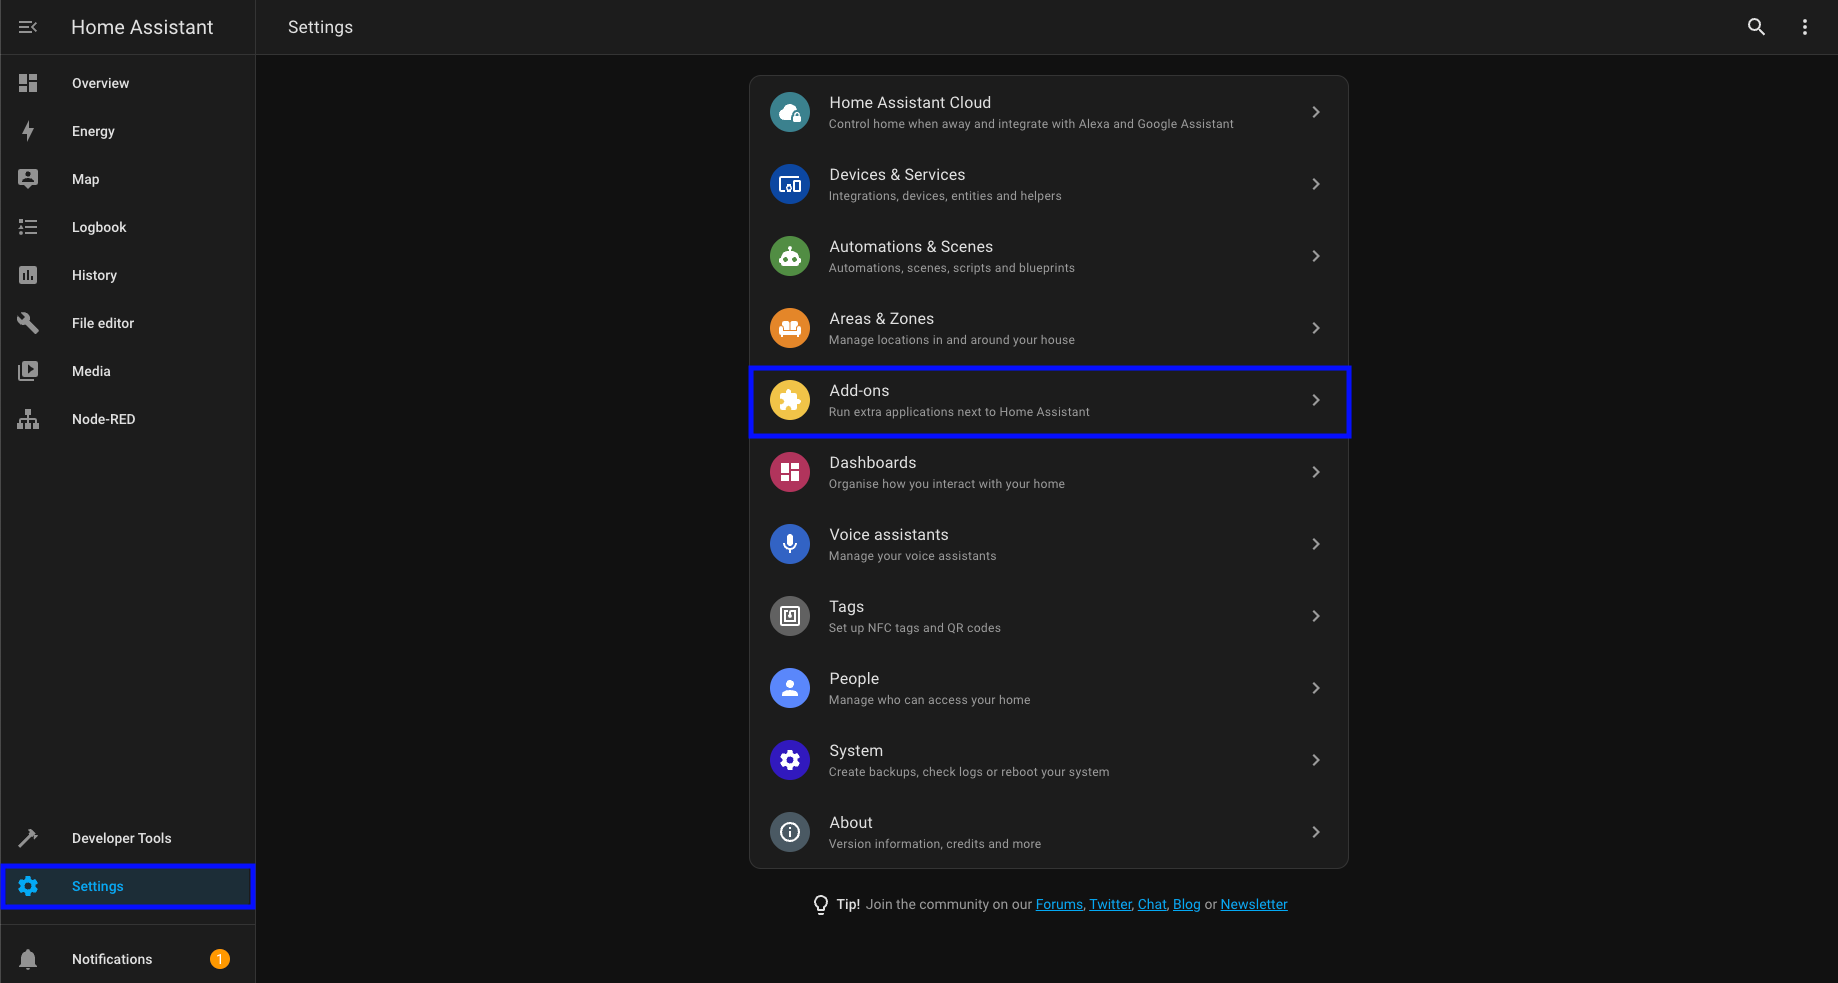
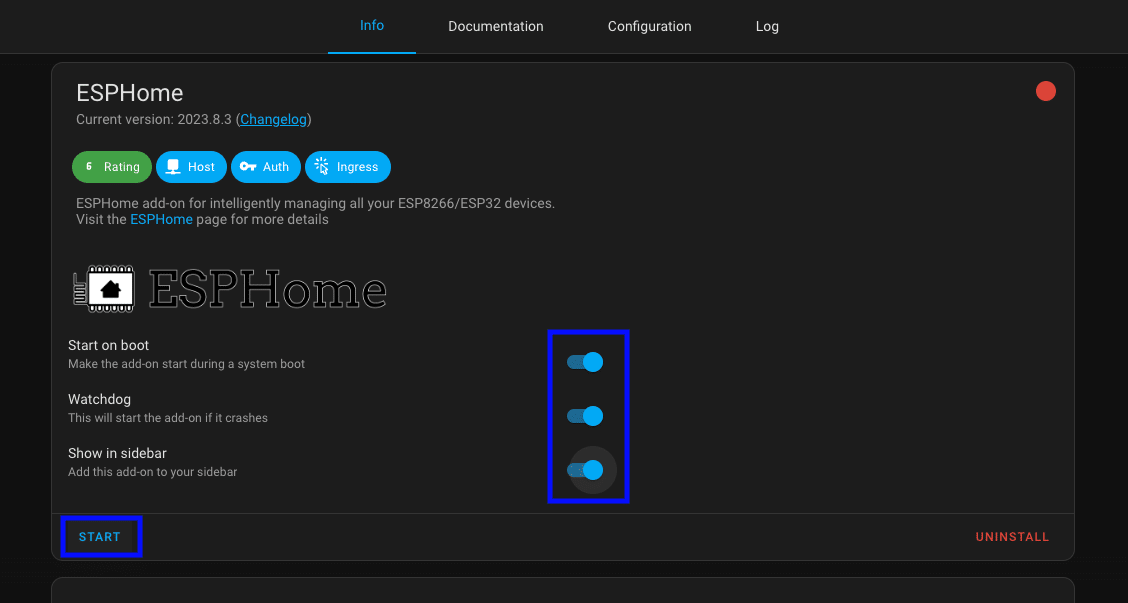
Select the ESPHome add-on and click on INSTALL.

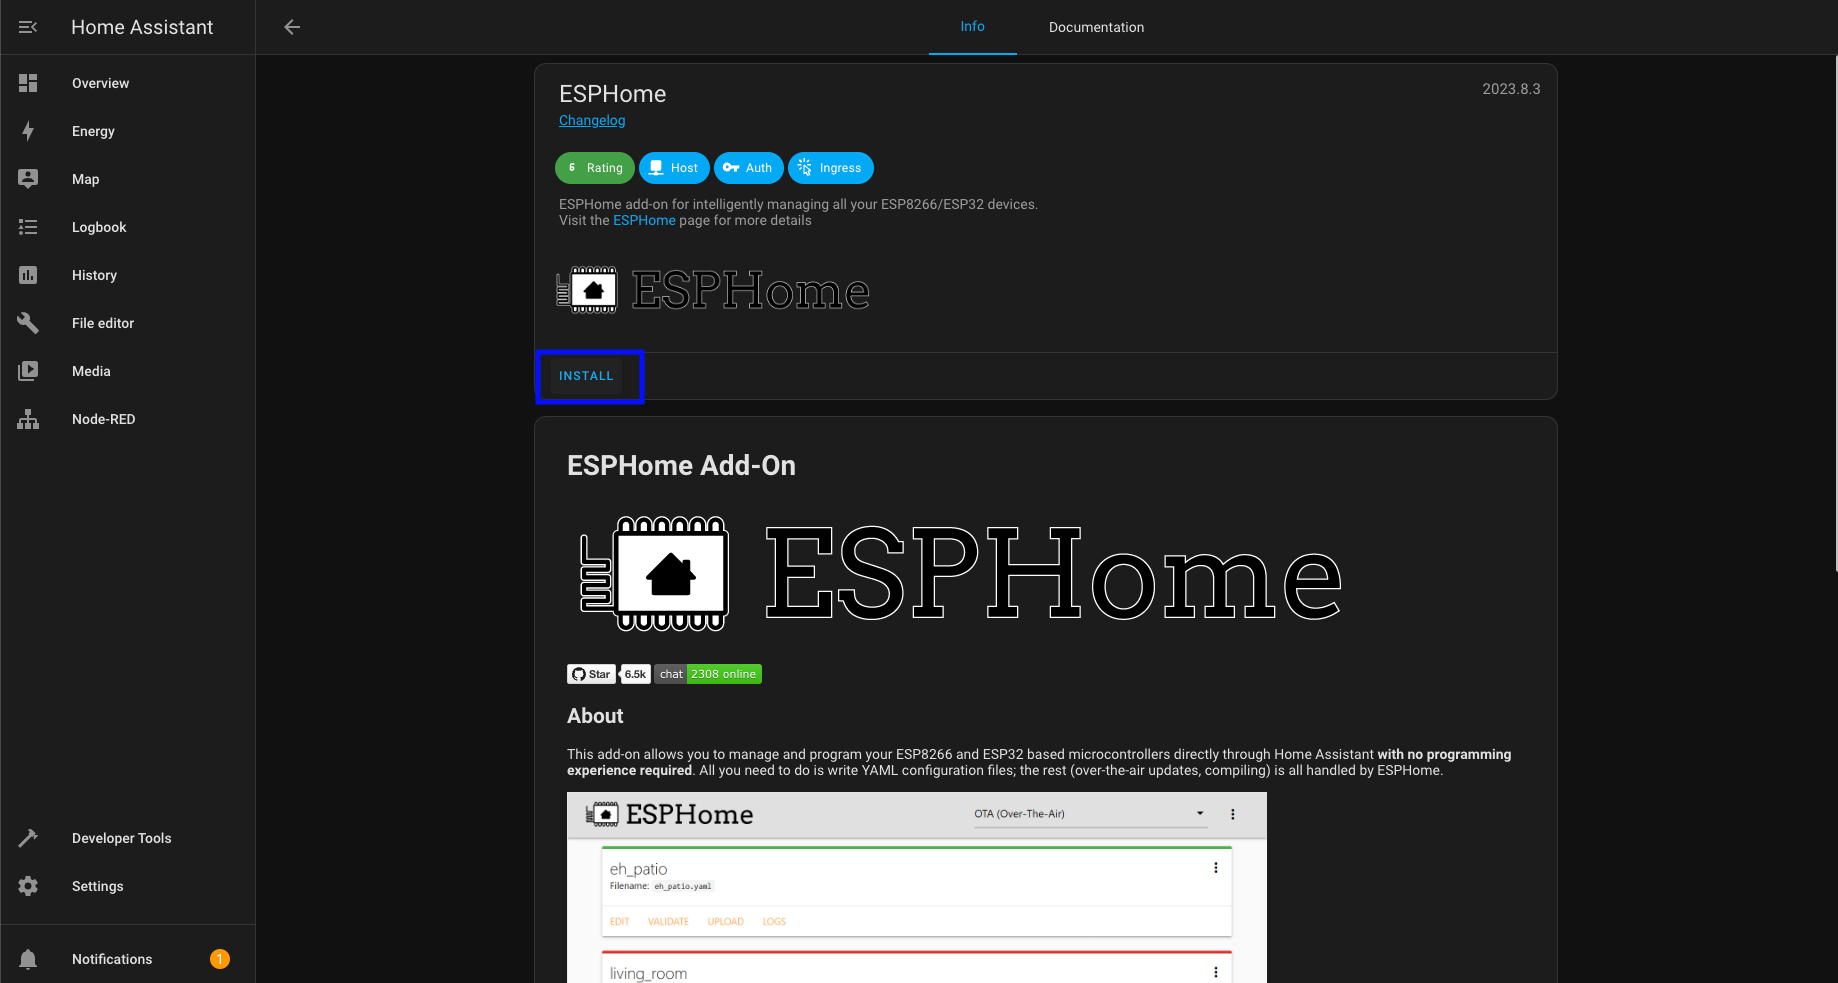
Once installed check all the sliders and click on START.
STEP 6 – Adopting the controller in ESPHome
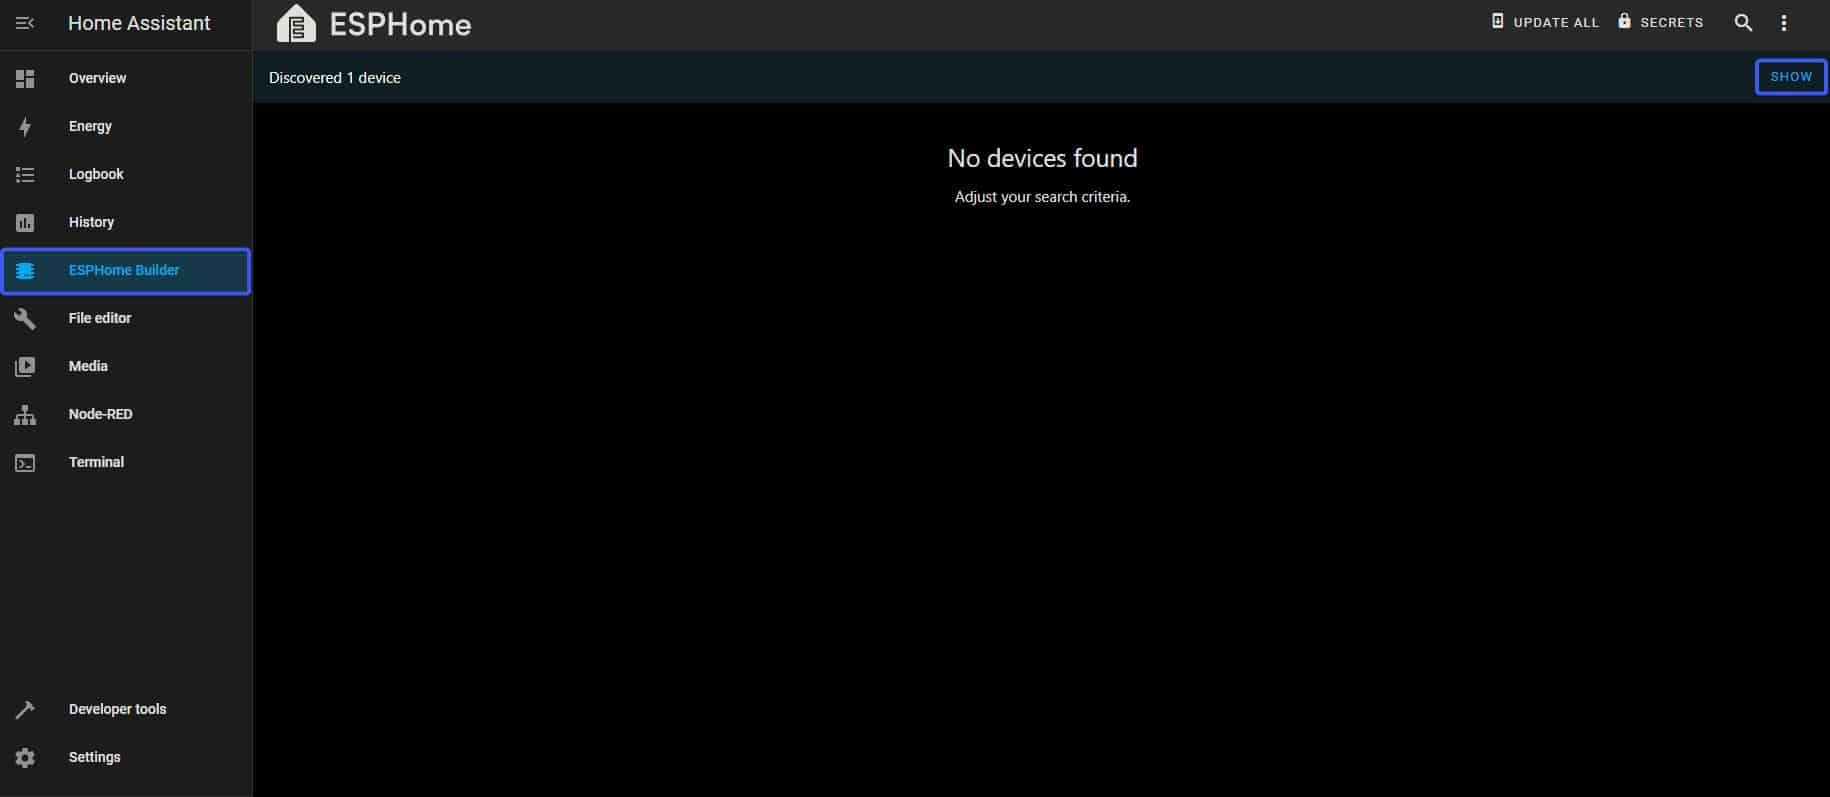
Open the ESPHome web interface by selecting ESPHome Builder in the left menu in Home Assistant.
Your new device should be found by Home Assistant. Depending on the version you first need to click show in the top right corner.
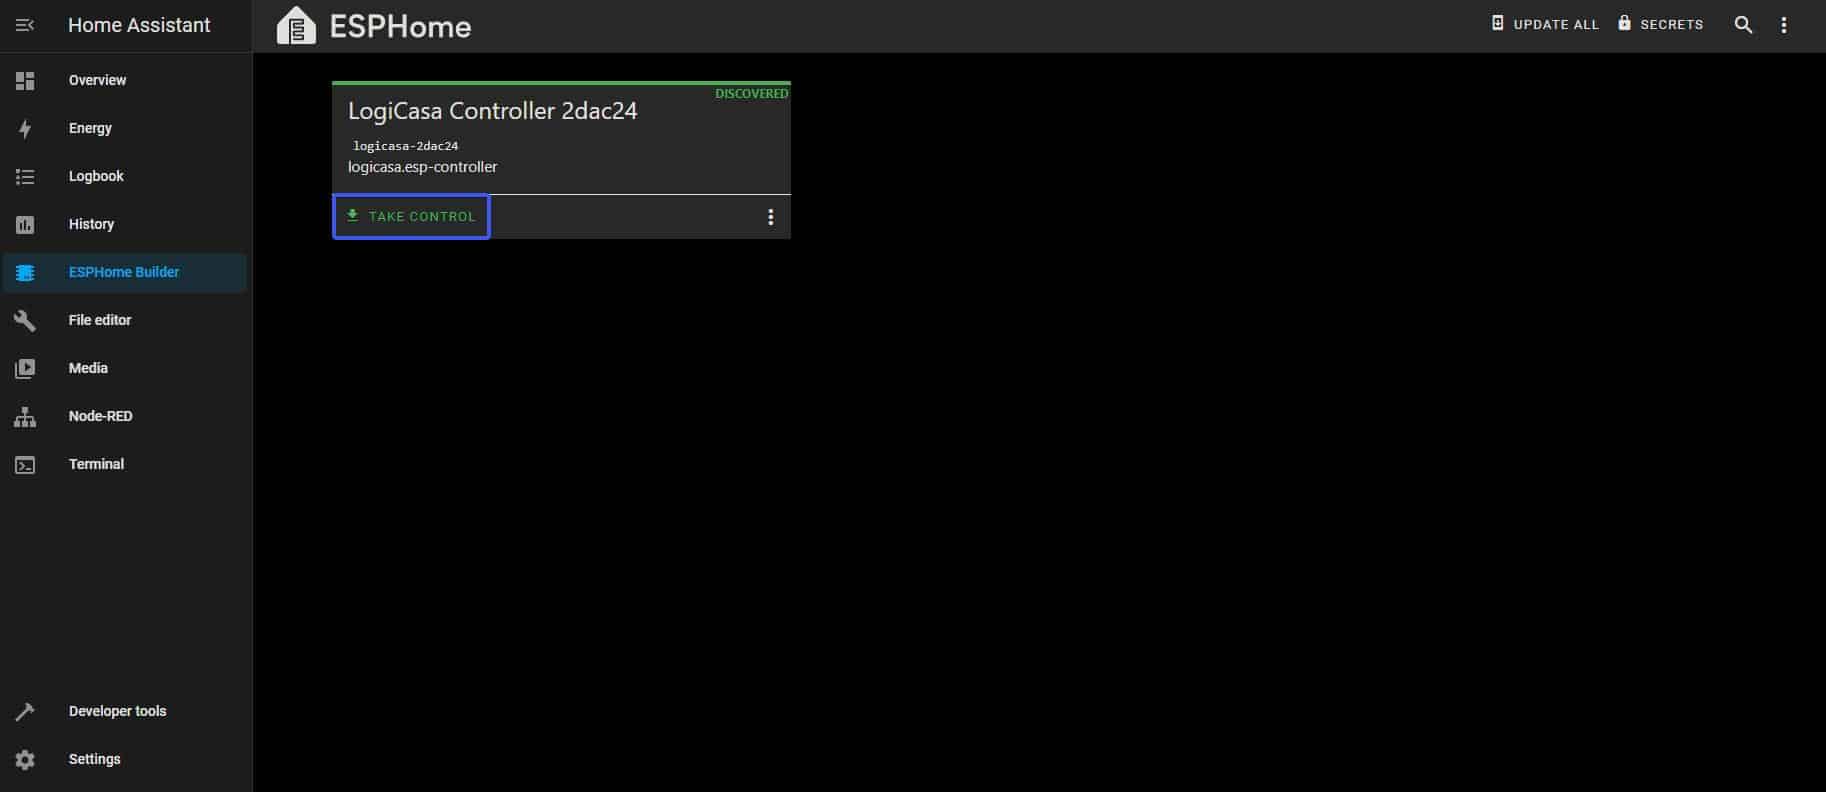
Click on Take Control and choose a name for your new device. Please note that the name should be unique. If you’re planning on installing more than one input controller add a number to the name to easily identify them later. (eg. ESP Controller 1)
Next you will be prompted to install the device. Click on INSTALL to install the latest version of the software to your device.
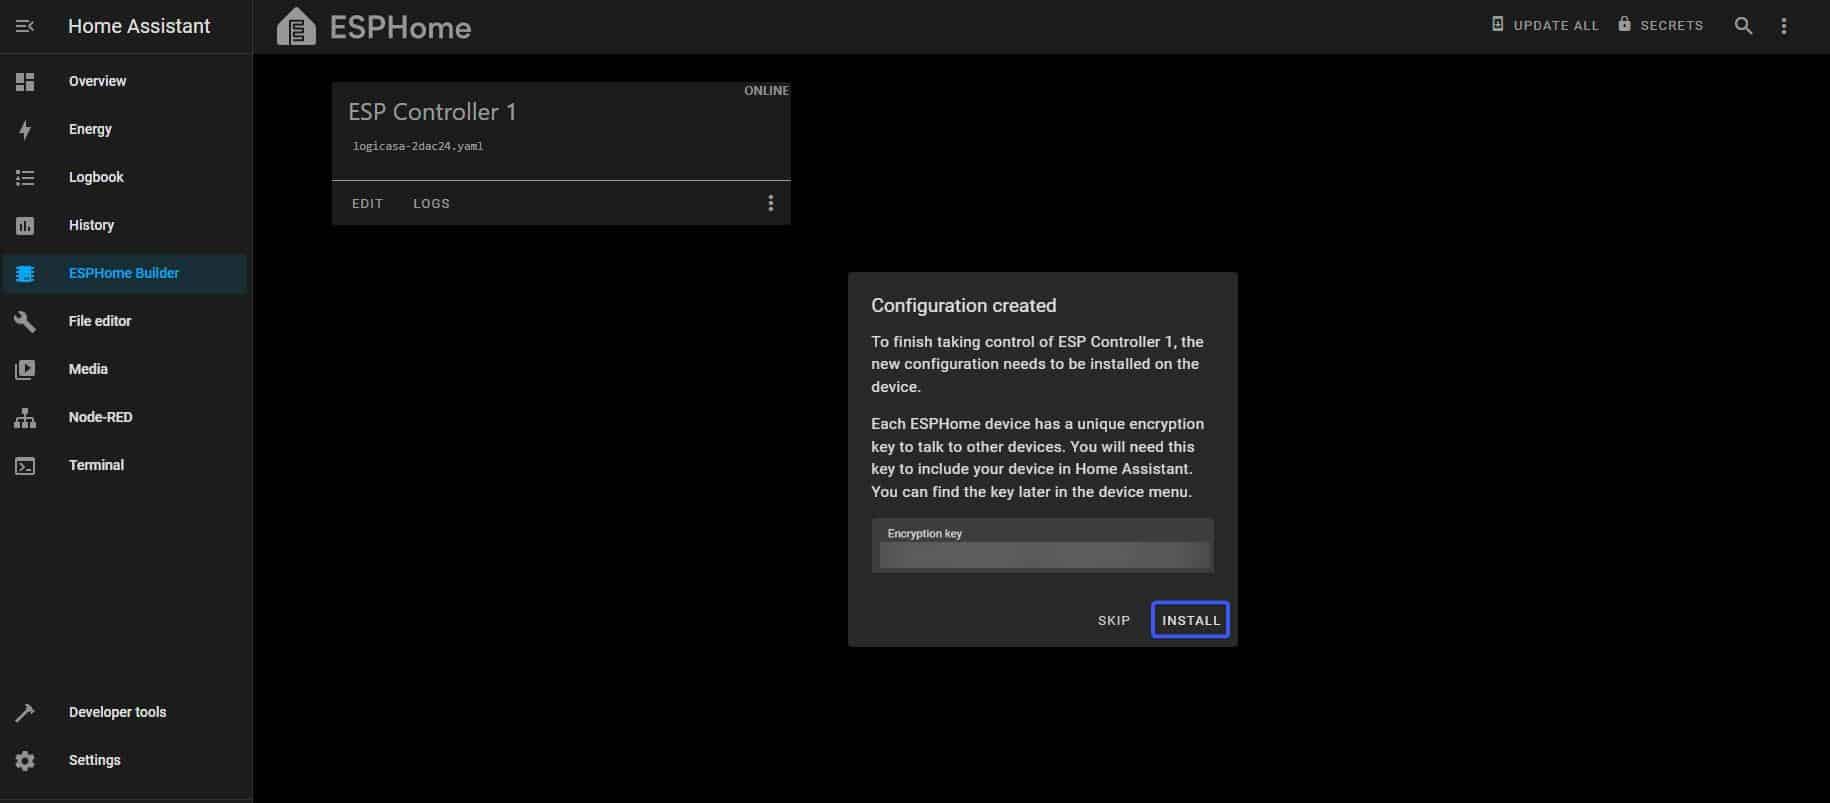
Give the process time to finish and make sure the upload is successful. Click STOP to close this window.
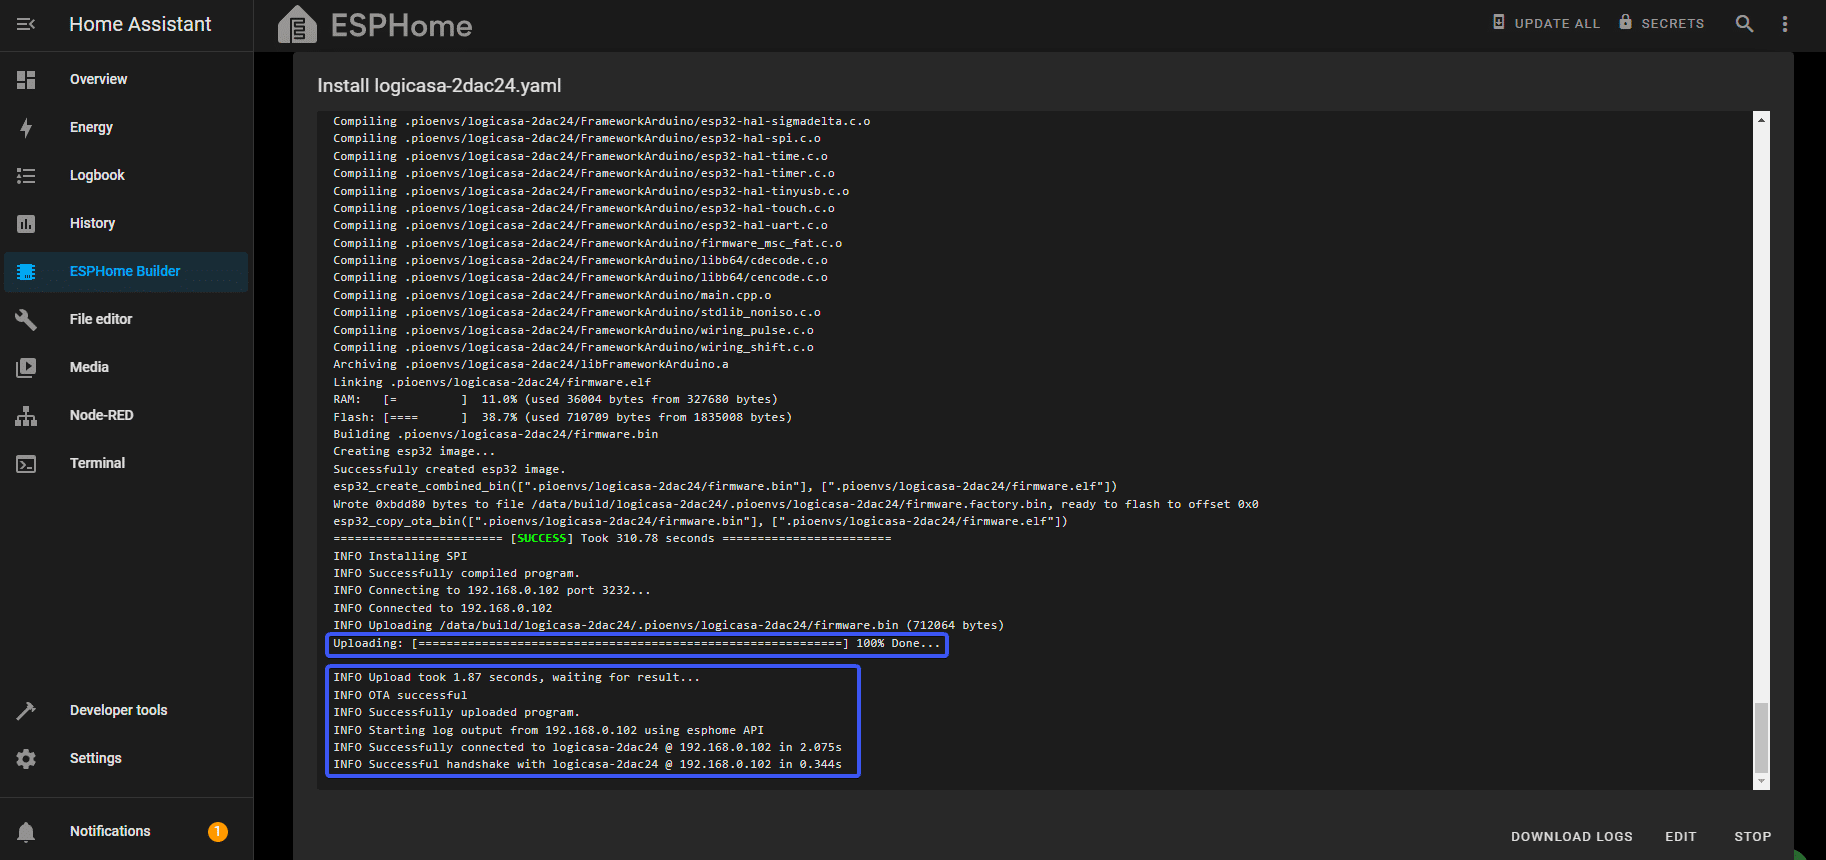
If the installation is successful the LED on the device will turn from red to blue, indicating it is successfully connected to Home Assistant.
STEP 7 – Renaming the hostname of the device
Rename the hostname of your device before adding it to Home Assistant. By default the initial name of the device will be used for each entity of the device for easy identification later. We advise to use a short name that allows you to identify your device later. (eg. esp-ctrl-1)
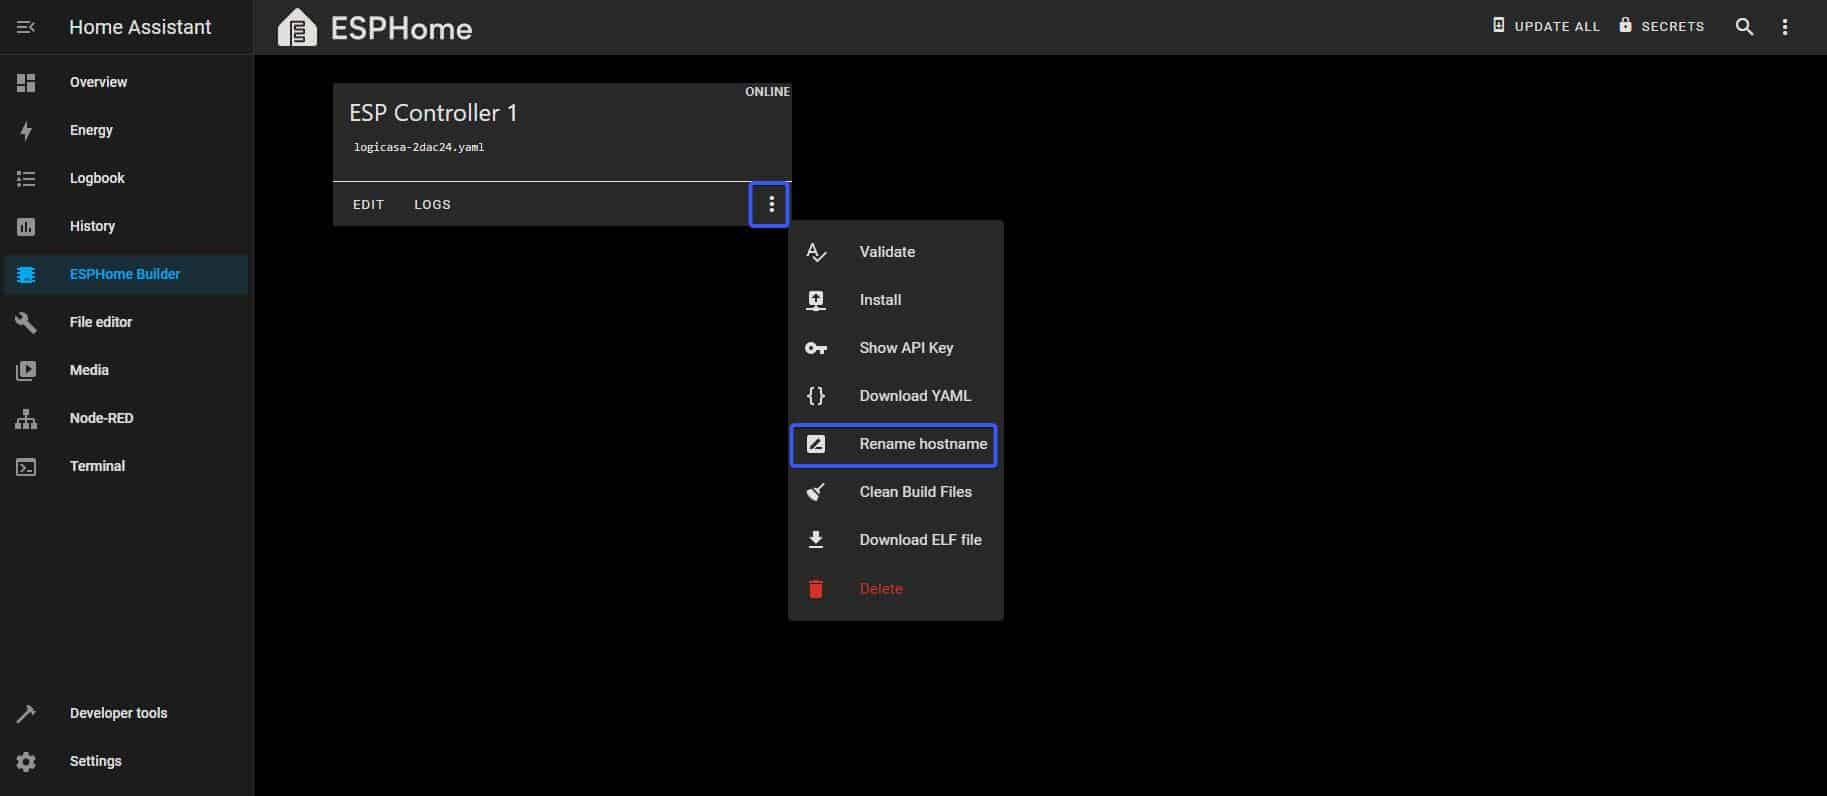
Click on the three dots to open the menu in the ESPHome interface and select the option RENAME HOSTNAME enter a unique name for the device.
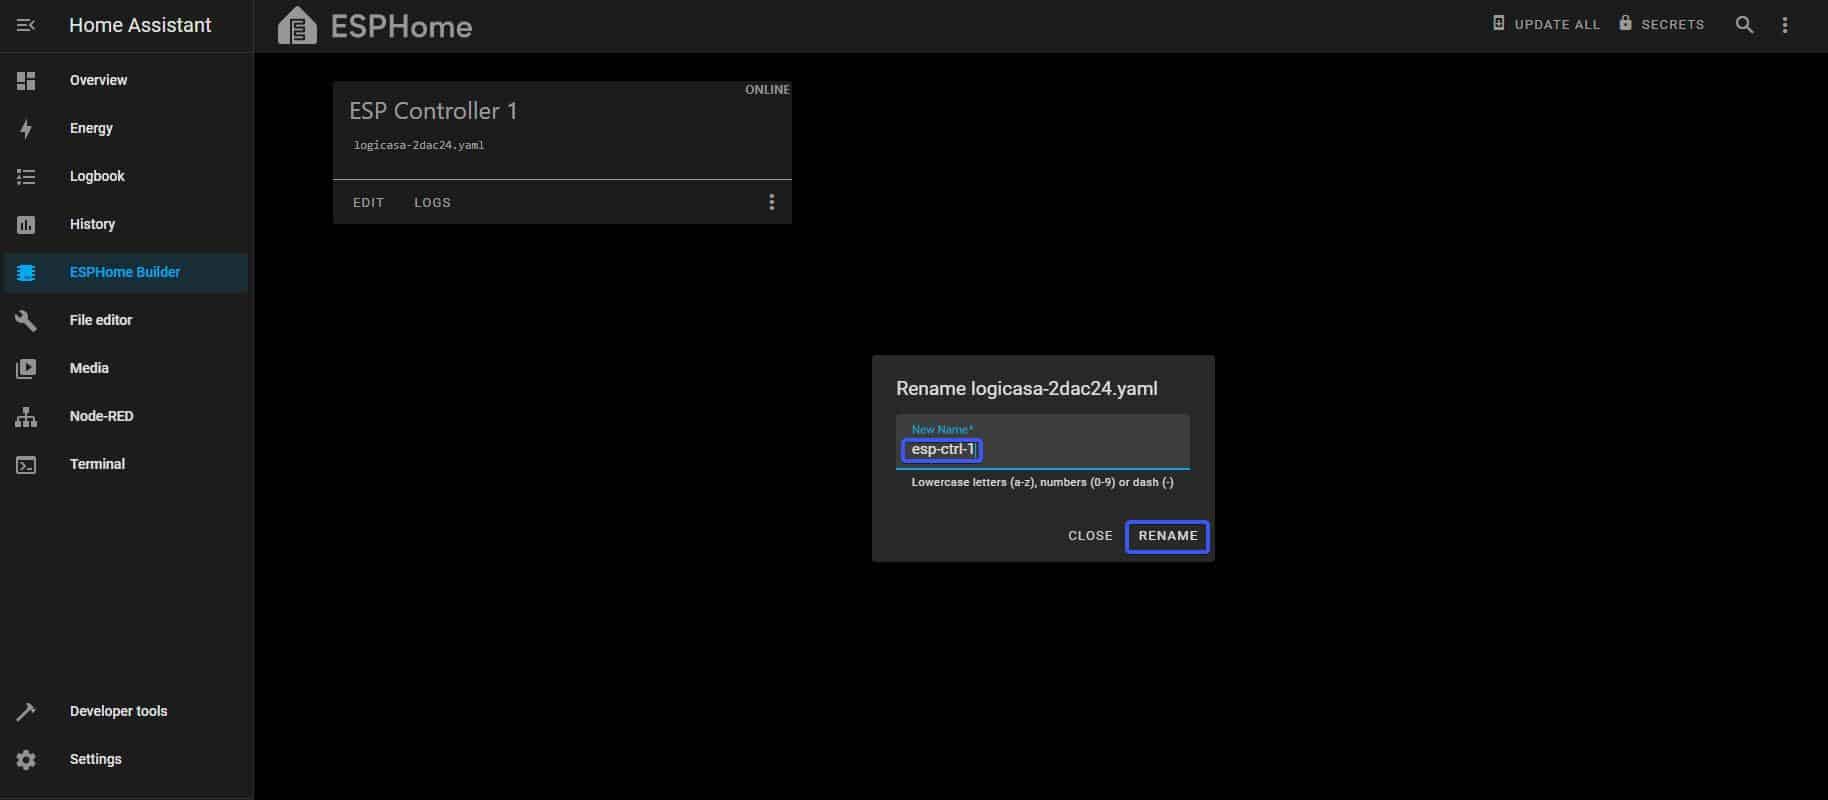
Wait for the process to finish.
STEP 8 – Integrate the device in Home Assistant
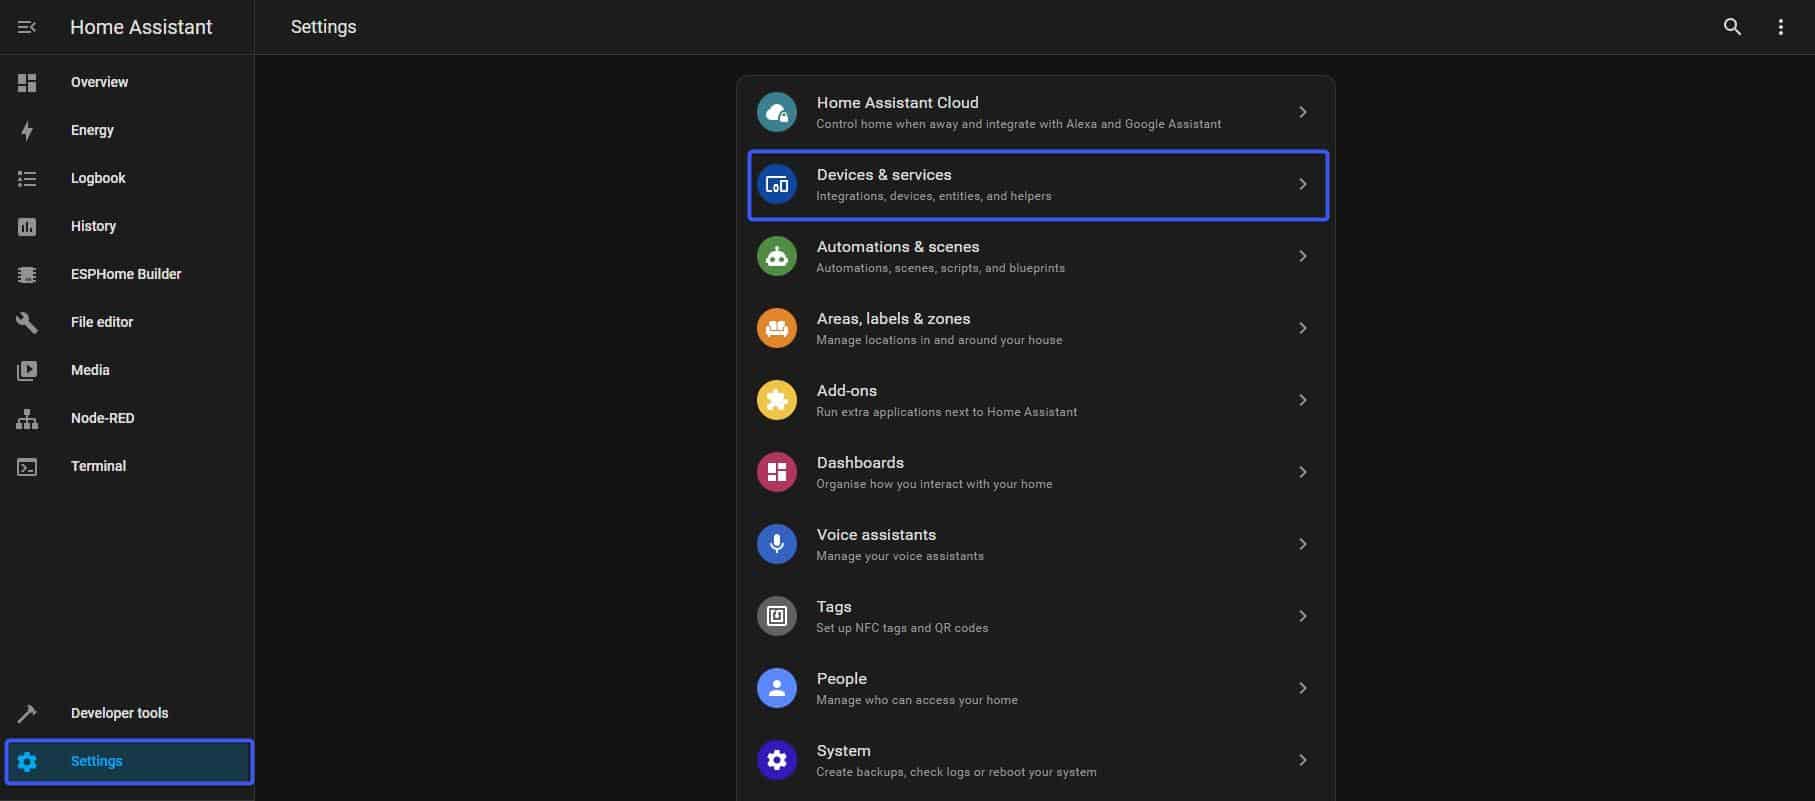
Now we will add the device to Home Assistant to start using it in your automations. Go to Settings à Devices & Services. Home Assistant will discover your new device automatically and it will be listed for configuration.
Click on ADD and click SUBMIT.

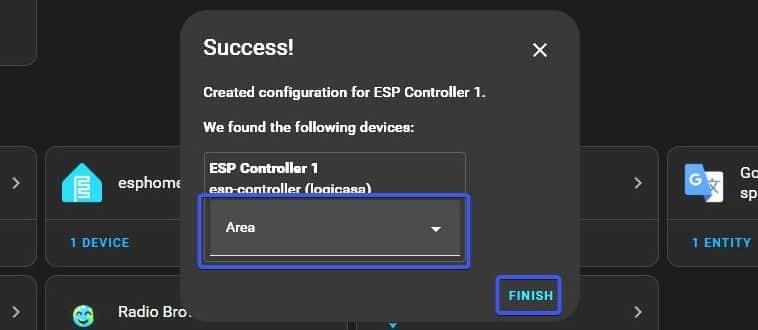
You will be prompted with a success message where you have the option to assign the device to a room. We advise you to not assign it to a room because home assistant will automatically assign all the entities to that room. Finish the setup by clicking FINISH.
You are now ready to use the device in Home Assistant.
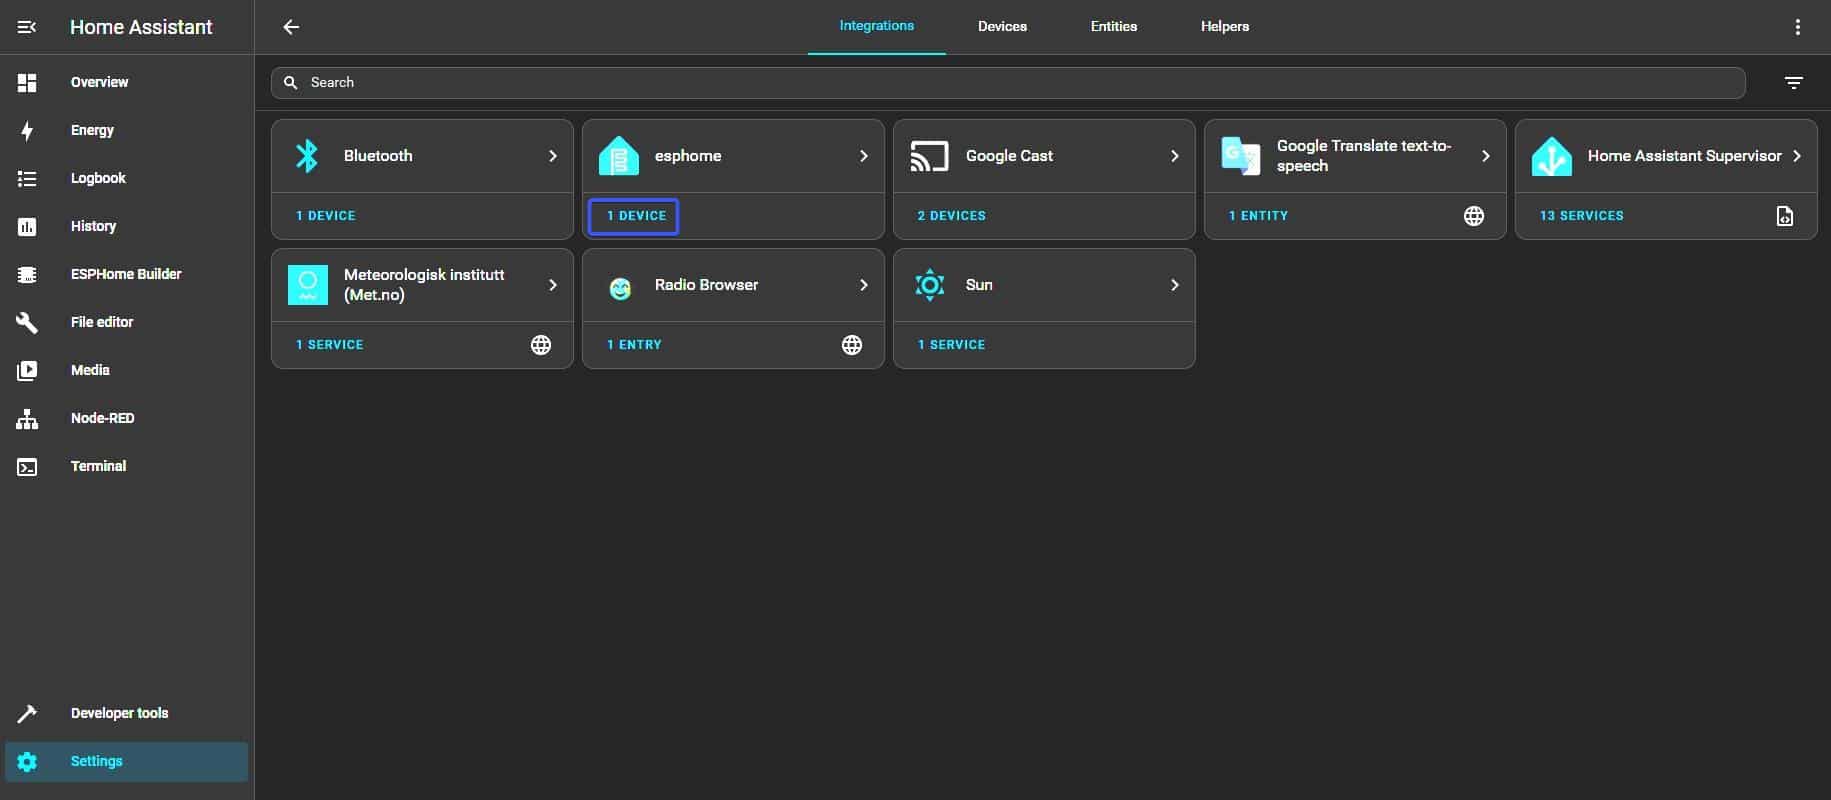
Click on Settings -> Devices & Services and search for the ESPHome integration on the page. Open the Device page by clicking your device.
This overview will show you all the entities the device exposes to Home Assistant ready to be used in automations.
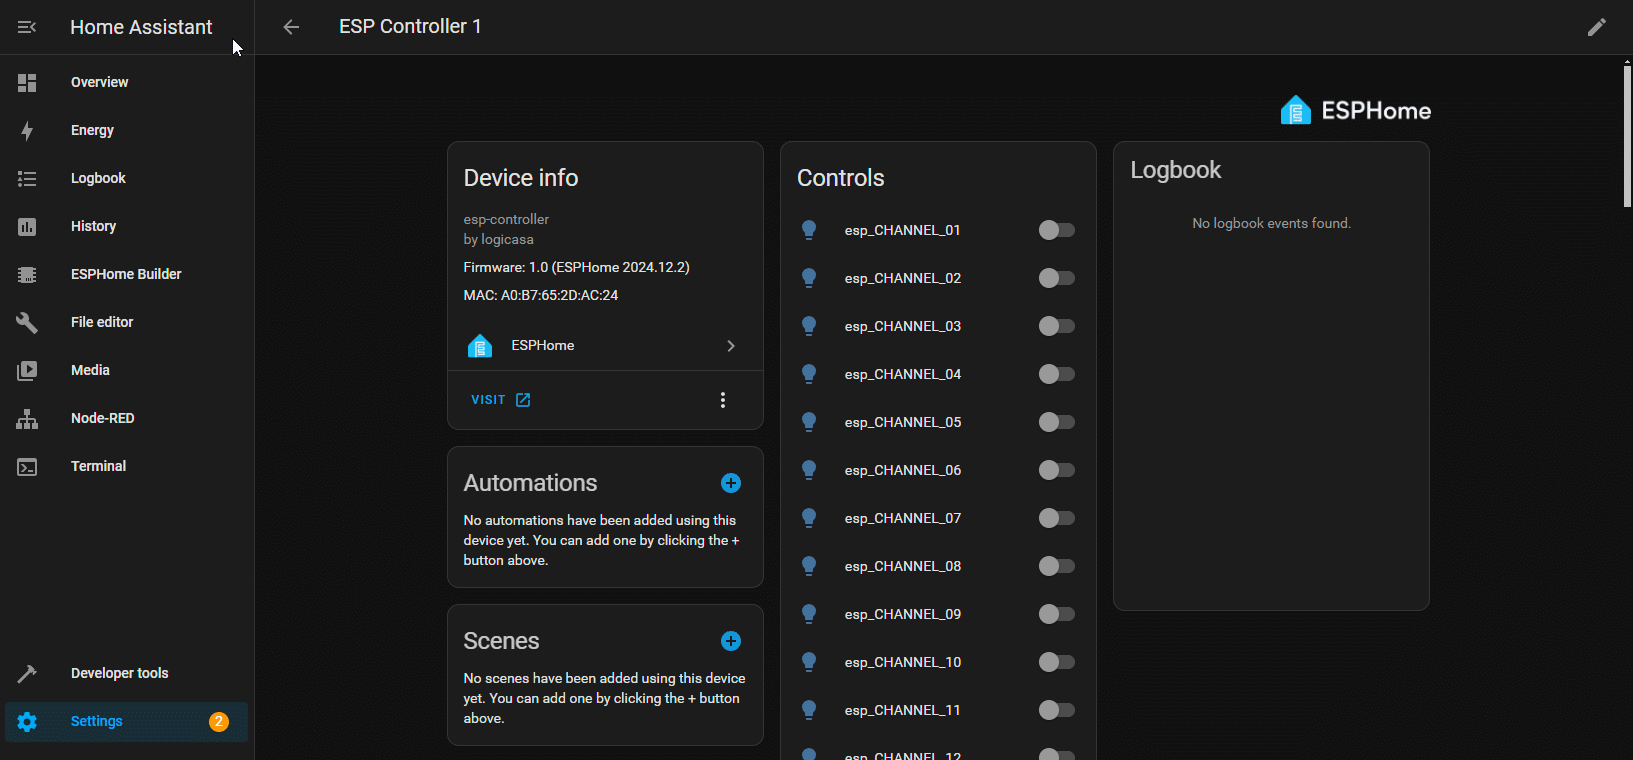
You will see a long list of controls, sensors and other entities exposed by the home controller. In the table below you can find a brief description of the different entities.
| Name | Entity type | Description |
|---|---|---|
| CHANNEL_01–>32 | Light | These entities represent lights for all 32 digital outputs. You can rename these channels to represent the connected appliances for easy identification. |
| Status LED | Light | This entity allows you to control the LED on the controller. You can also adjust brightness or change color if desired. |
| INPUT_01–>48 | Binary Sensor | These entities represent binary inputs for all 48 digital inputs on the controller. When the input receives a +24VDC signal the corresponding entity in Home Assistant will be active. If desired you can also rename these entities for easy identification. |
| Reboot ESP | Switch | This switch allows you to reboot the Home Controller from within Home Assistant. |
| IP Address | Text Sensor | Represents the current IP address of the Home Controller |
| MAC Address | Text Sensor | Represents the MAC address of the Home Controller |
STEP 9 – Create your first automation
Let’s create our first automation in Home Assistant.
This tutorial will create an automation to toggle the state of a light connected to CHANNEL_01 when a button is pressed connected to INPUT_01.
Consult the wiring documentation for more information.
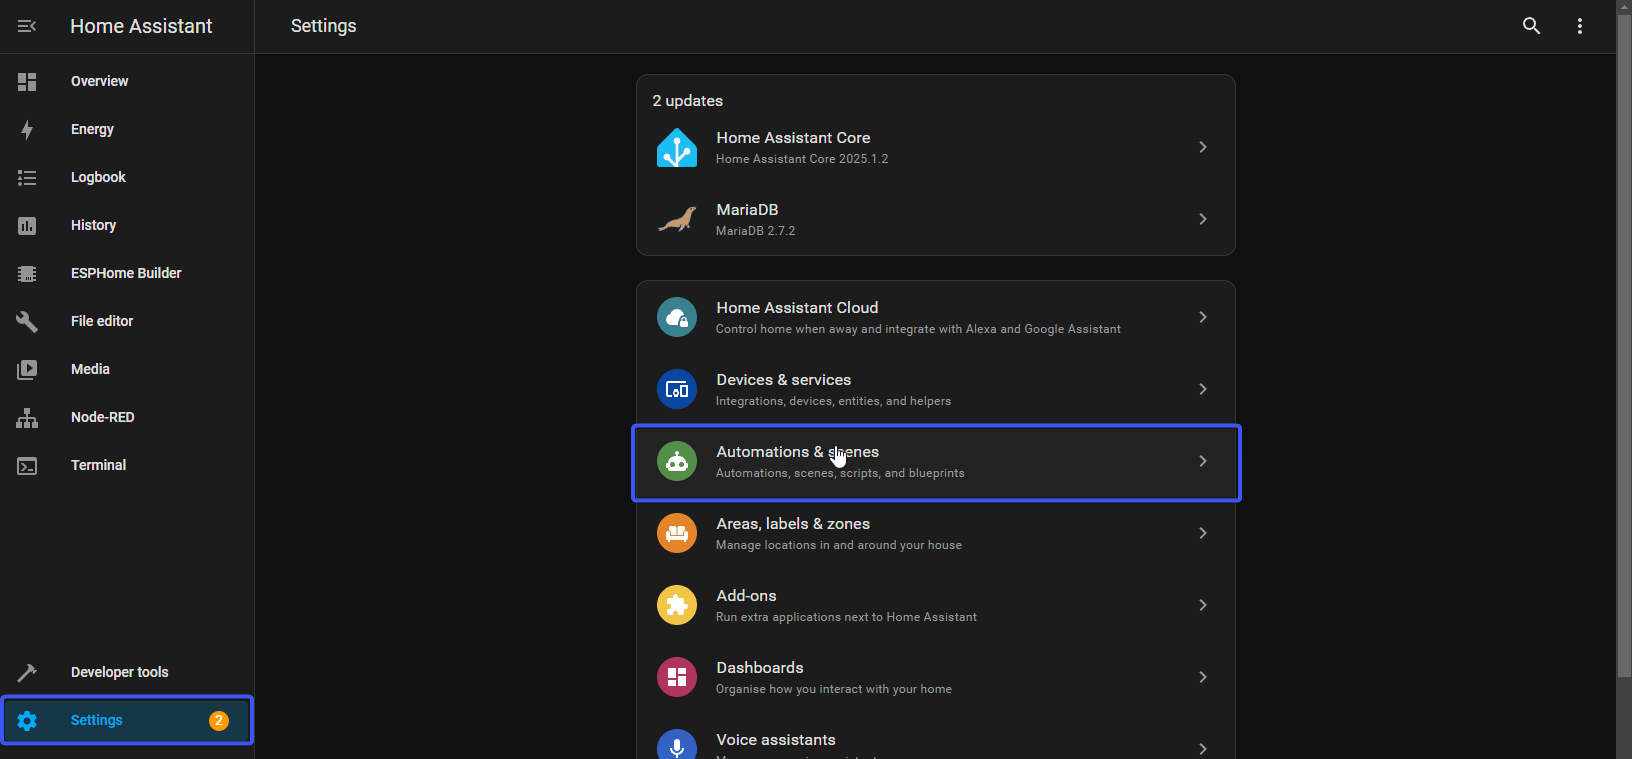
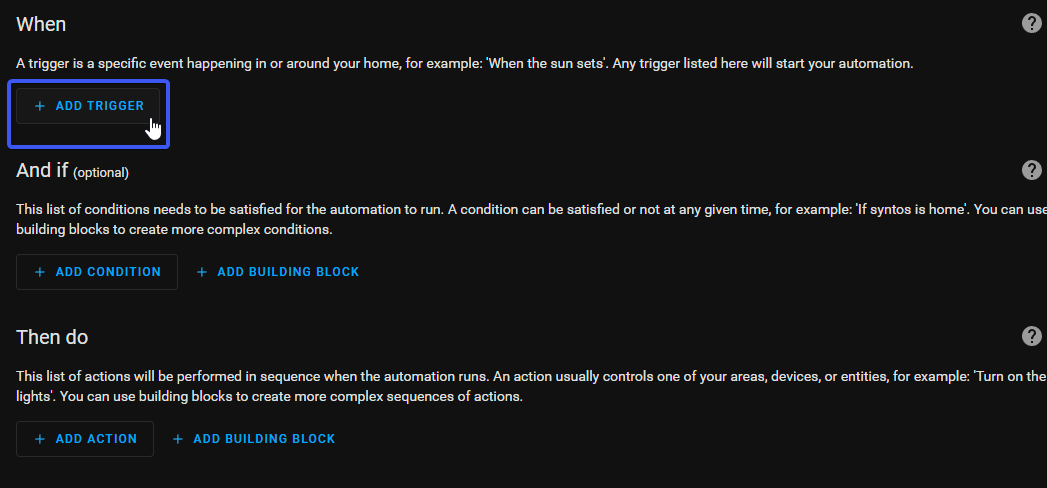
Go to Settings -> Automations & Scenes. In the right bottom corner click on CREATE AUTOMATION.
Select Create New Automation to open a new Automation page in the GUI. Click on ADD TRIGGER.
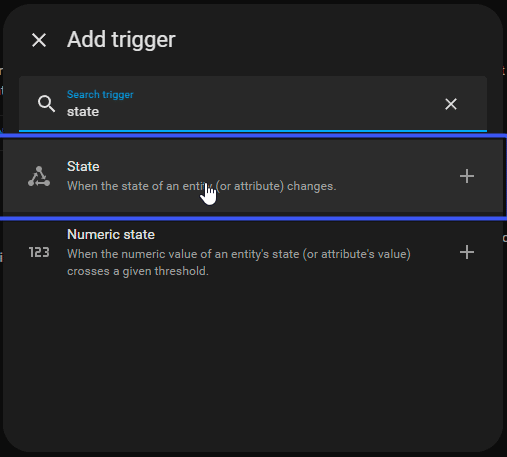
Select State from the list.
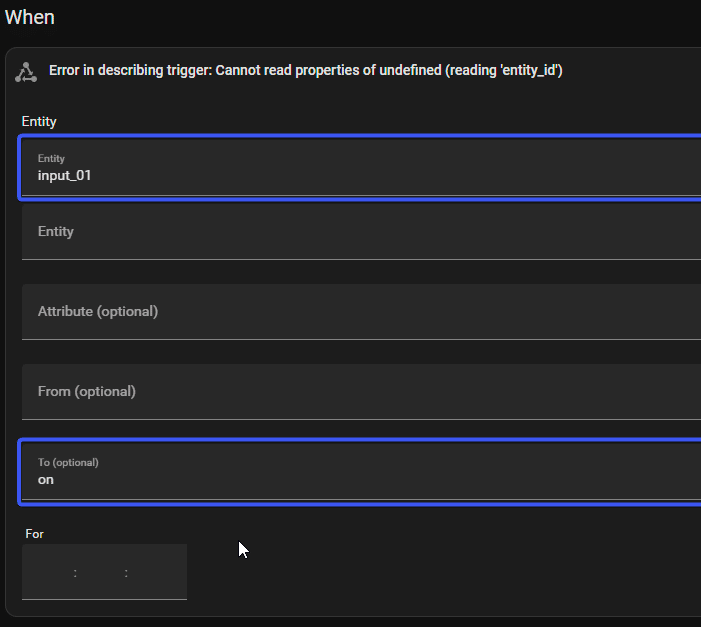
Search for the entity of the input you want to create an automation for and set the ‘To’ field to ‘on’ to react on a push of a button.
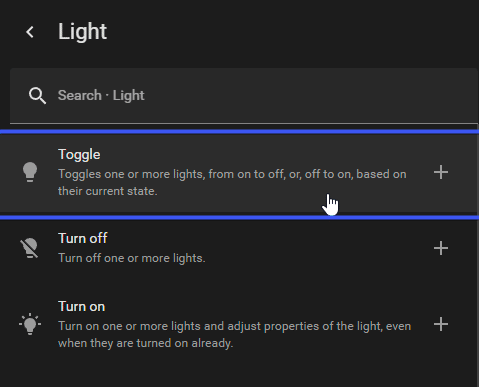
Click on ADD ACTION to select what should happen when the button is pressed. In this example we will activate output channel 1 on the Home Controller which will toggle a relay servicing a light.

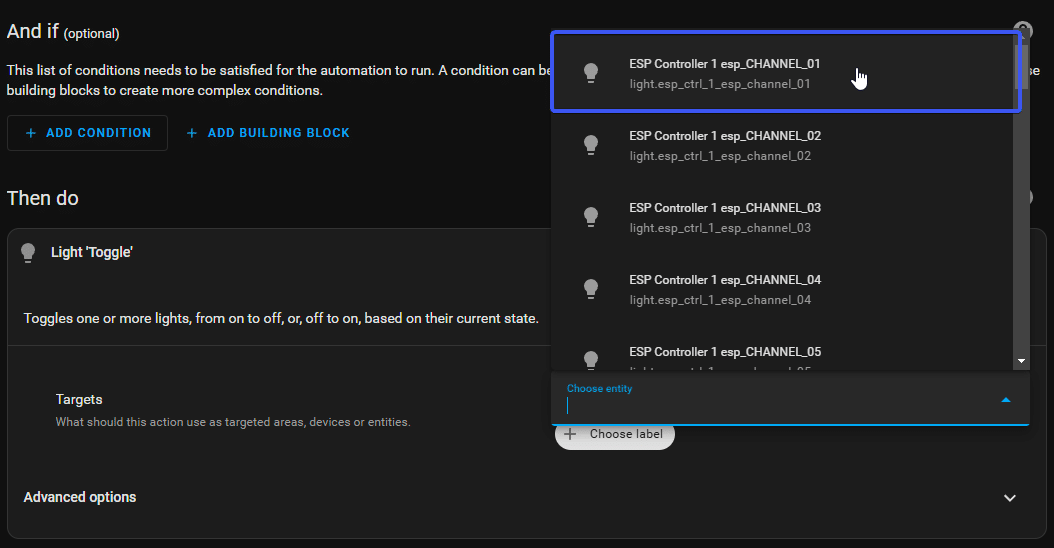
Choose Light –> Toggle from the popup.
In the targets section click on Choose entity and select the correct output of the controller.
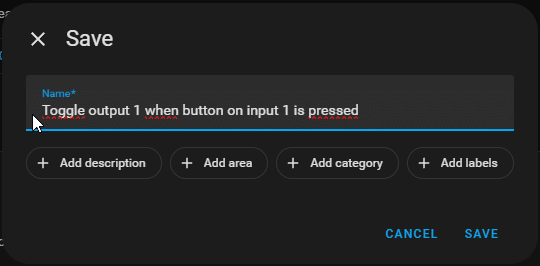
Click SAVE and give your automation a name to identify it in the list later.
Congratulations, you’ve created your first automation. Test your automation by pushing the button connected to the input you selected, and the selected output should be toggled on each press of the button.
This is a basic example of what you can accomplish with the Logi.Casa Home Controller. The possibilities are endless, you can trigger every possible entity available in Home Assistant.
- Toggle or dim lights in Home Assistant
- Activating scripts or other automations
- Toggle blinds or covers available in Home Assistant
- Open or close a lock
- Activate an alarm
- Control a Media Player to play or stop music
- …